

This lesson is made with PSPX9
But is good with other versions.
© by SvC-Design

Materialen Download :
Here
******************************************************************
Materials:
AVRIL 2023 CHAISE LONGUE 24 04 23 SWEETY.png
AVRIL 2023 LUDMILLA 2 24 04 23 SWEETY.png
FEVRIER 2022 MOUETTE 1 22 02 22 SWEETY pspimage.png
FEVRIER 2022 MOUETTES 2 22 02 22 SWEETY pspimage.png
WALPAPERS 23 L.jpg
SELECTION 1 196 .PspSelection
SELECTION 2 196 .PspSelection
SELECTION 3 196 .PspSelection
SIGNATURE TUTORIELS .pspimage
PALETTE COULEURS 1 196.png
DECO OMBRE PORTEE ETAPE 10 196 AVRIL 2023 SWEETYpspimage.png
DECO GLASS ETAPE 3 196 AVRIL 2023 SWEETY.png
DECO PERSO ETAPE 10 196 AVRIL 2023 SWEETY.png
DECO PERSO POUR CADRE FINAL ETAPE 11 196 AVRIL 2023 SWEETY pspimage.png
DECO PERSO ETAPE 6 196 AVRIL 2023 SWEETY.png
DECO INTERIEUR CADRES ETAPE 4 196 AVRIL 2023 SWEETY .pspimage
PETITS CADRES 196 AVRIL 2023 SWEETY.png
******************************************************************
Plugin:
Effects – plugin – Toadies - Blur'em
Effects – plugin - Nick Software==>Color Efex pro 3.0==>complete
Effects – plugin - VM Toolbox - Zoom Blur
******************************************************************
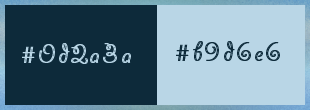
color palette
:
******************************************************************
methode
When using other tubes and colors, the mixing mode and / or layer coverage may differ
******************************************************************
General Preparations:
First install your filters for your PSP!
Masks: Save to your mask folder in PSP, unless noted otherwise
Texture & Pattern: Save to your Texture Folder in PSP
Selections: Save to your folder Selections in PSP
Open your tubes in PSP
******************************************************************
We will start - Have fun!
Remember to save your work on a regular basis
******************************************************************
1.
Choose an image that you like. Take two colors:
(Foreground (AVP): Dark / Background (ARP): Light –
Open a new transparent image of 950/600 px
Selection - Select All
Open WALPAPERS 23 L.jpg
Edit - Copy.
Edit - Paste into selection.
Selection - Select None
Effects - Image Effects - Seamless Tiling- default
Layers - Duplicate
Image - Mirror – mirror Horizontal
Opacity of this layer at 50%
Layers – merge – merge down
==================================================
2.
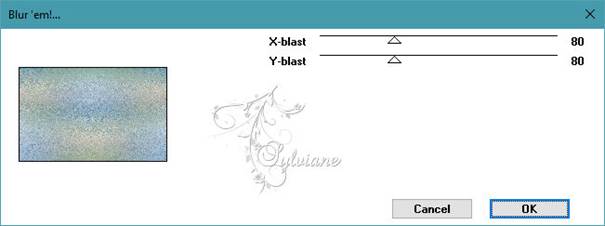
Effects – plugin – Toadies - Blur'em
Open PETITS CADRES 196 AVRIL 2023 SWEETY.png
Edit – Copy
Edit - Paste as new layer
DO NOT MOVE IT IS IN ITS PLACE ...
Mode of the layer of your choice or color according to your tastes:
(For my 2 versions I chose the color AVP)
==================================================
3.
Magic Wand tool==>tolerance and progressiveness to 0 –
Click inside the middle layer:
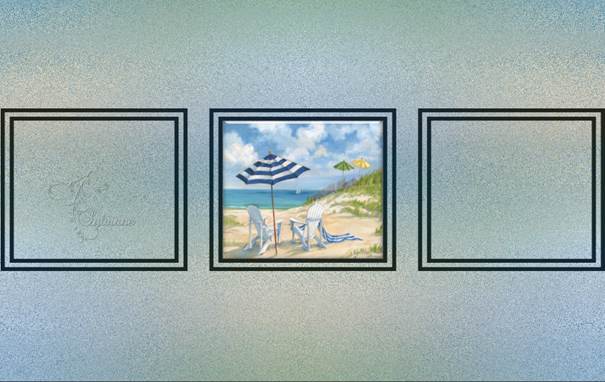
Layers - New Raster Layer
Layers – arrange – move down
Open WALPAPERS 23 L.jpg
Edit - Copy.
Edit - Paste into selection.
Selection - Select None
Open DECO GLASS ETAPE 3 196 AVRIL 2023 SWEETY.png
Edit - Copy.
Edit - Paste as new layer
DO NOT MOVE IT IS IN ITS PLACE ...
Resize to 102% bottom box not checked
Layers – merge – merge down
==================================================
4
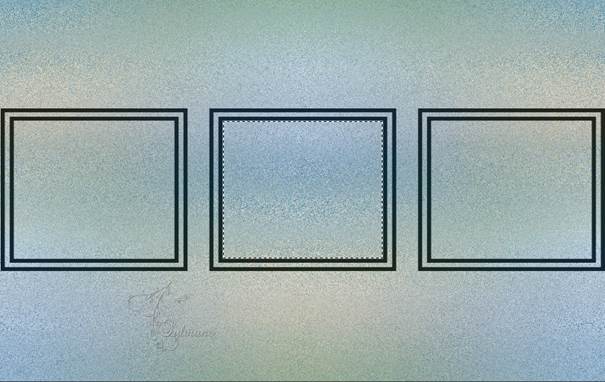
We get this and we are on the middle layer (Raster 3):
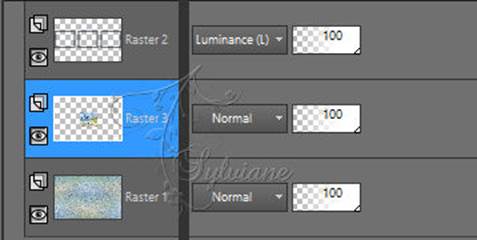
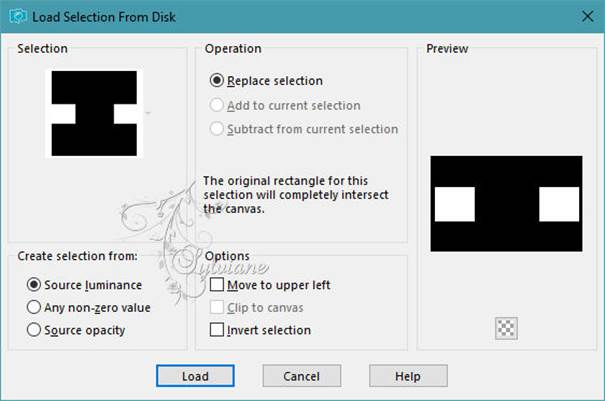
Selections - Load / Save - Load selection from disk - SELECTION 1 196 .PspSelection
Layers - New Raster Layer
Open WALPAPERS 23 L.jpg
Edit - Copy.
Edit - Paste into selection.
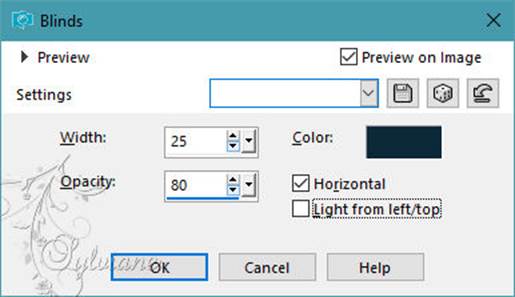
Effects - Texture Effects – Blinds –color:AVP
Selection - Select None
Layer opacity between 65% and 70% (depending on your image):
Open DECO INTERIEUR CADRES ETAPE 4 196 AVRIL 2023 SWEETY .pspimage
Edit - Copy.
Edit - Paste as new layer
DO NOT MOVE IT IS IN ITS PLACE
The PSP decoration is on mode * Multiply * and its opacity at 85% -
Change if you wish
==================================================
5.
Our layers and tag look like this:
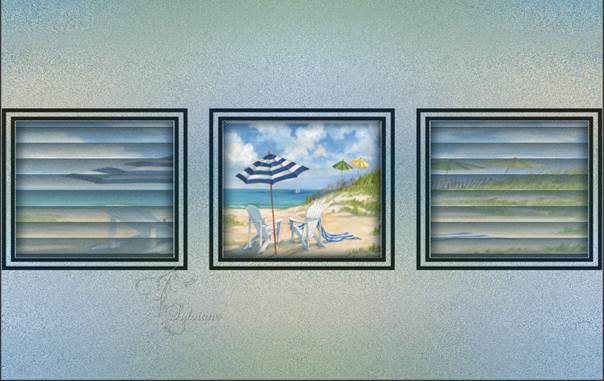
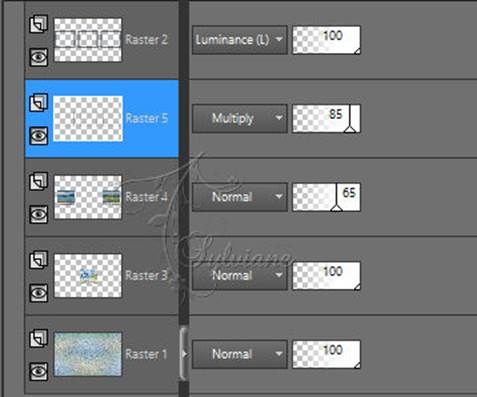
We are on Raster 5
Layers – merge – merge down (2x)
Activate Raster 2
Effects – 3D effects – inner bevel
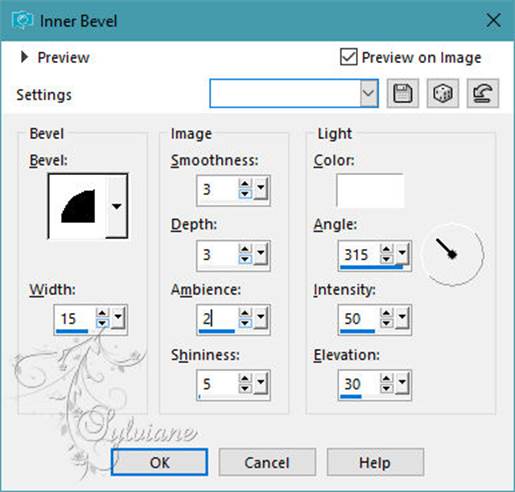
Layers – merge – merge down
==================================================
6.
Activate Raster 1
Effects – plugin - Nick Software==>Color Efex pro 3.0==>complete:
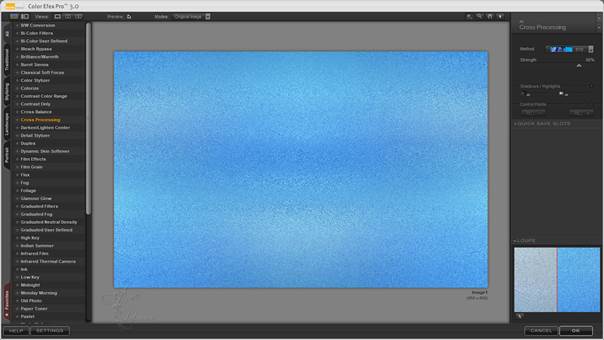
Open DECO PERSO ETAPE 6 196 AVRIL 2023 SWEETY.png
Edit - Copy.
Edit - Paste as new layer
DO NOT MOVE IT IS IN ITS PLACE ...
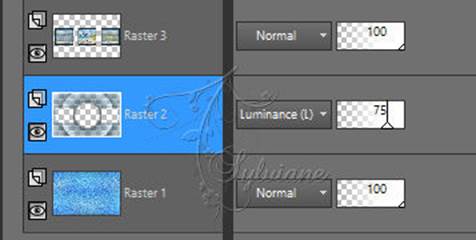
Blend Mode: Luminance (lagacy)
opacity at 75%
Our result:
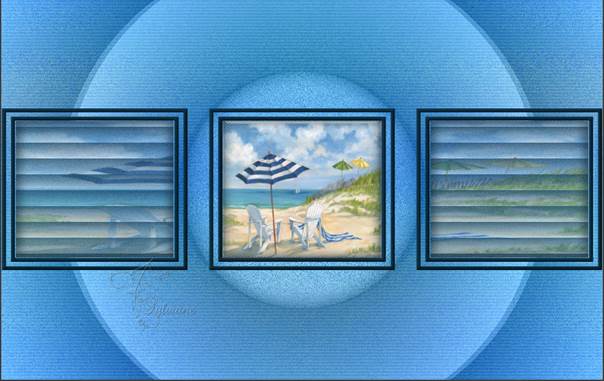
7.
Activate Raster 3
Activate Selection - Custom selection
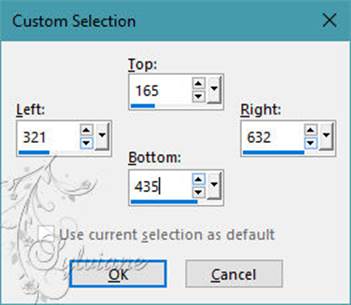
Selections – Promote selections to layer
Return to layer below (Raster 3)
Erase OR Delete on the keyboard.
Selection - Select None
We have this:
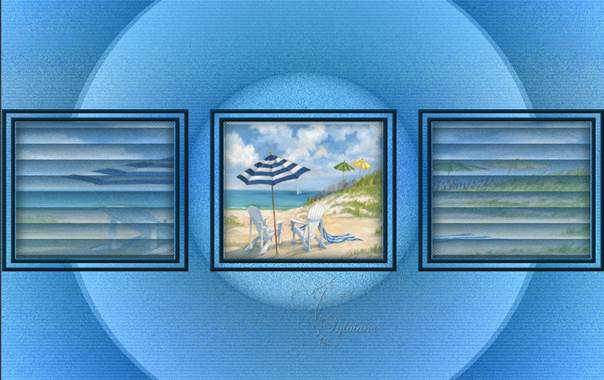
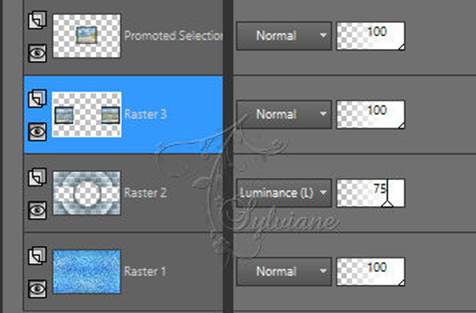
Actiavte Promoted Selection
Selections - Load / Save - Load selection from disk - SELECTION 2 196 .PspSelection
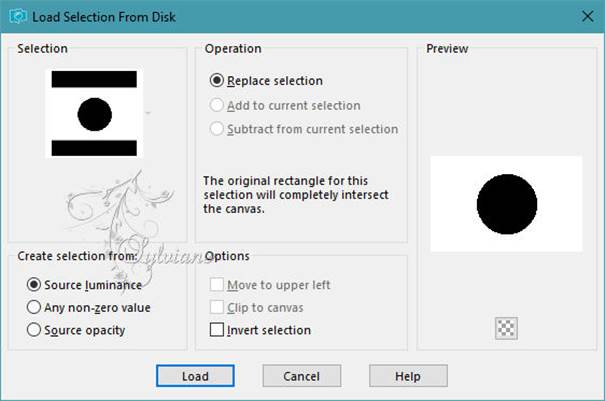
Erase OR Delete on keyboard
Selection - Select None
Layers – merge – merge down
==================================================
8.
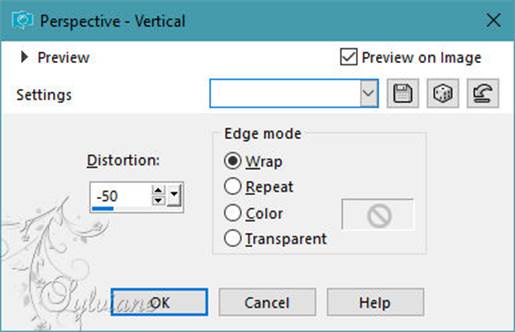
Layers - Duplicate
Effects - geometric effects – perspective vertical
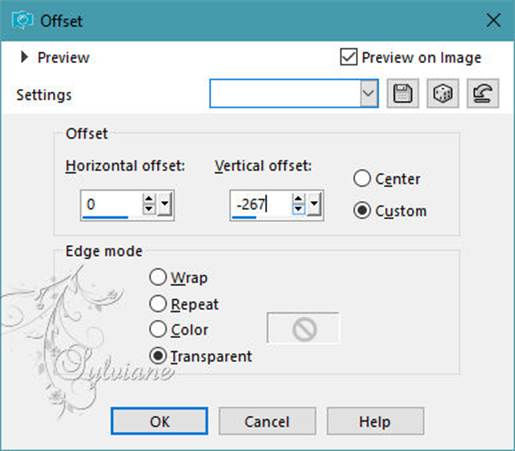
Effects - Image Effects
Selector tool enabled (K on the keyboard)... Arrange as on my capture:
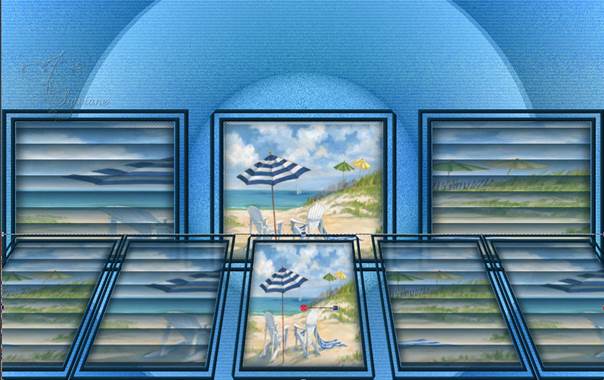
Disable the selector tool (M on the keyboard) .
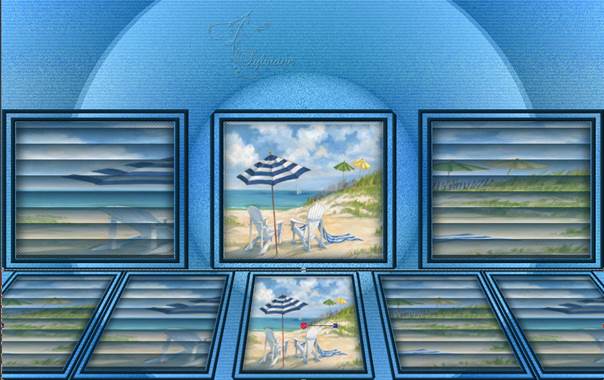
Layers - Duplicate
Image - Mirror - Vertical Mirror
Layers – merge – merge down
Layers – arrange – move down
Opacity of this layer between 55% and 60%:
Selections - Load / Save - Load selection from disk - SELECTION 2 196 .PspSelection
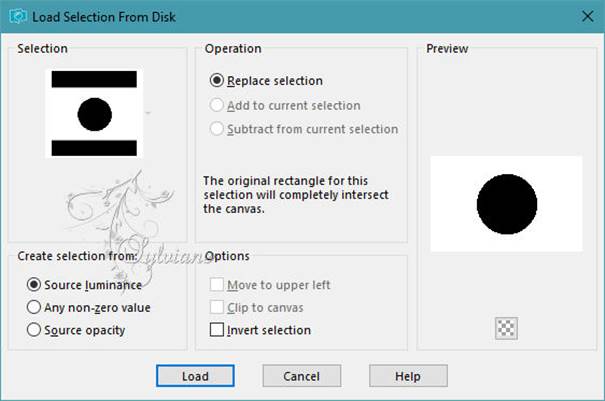
Selections - Invert
Erase OR Delete on the keyboard.
Selection - Select None
==================================================
9.
Activate Raster 3
Selection - Select All
Effects - 3D effects - Drop shadow: 0 / 0 / 100 / 50 / Black or AVP
Image - Add Borders – symmetric - 6 colors AVP or ARP
Selection - Select All
Add a border regardless of the color configured as follows- color:AVP
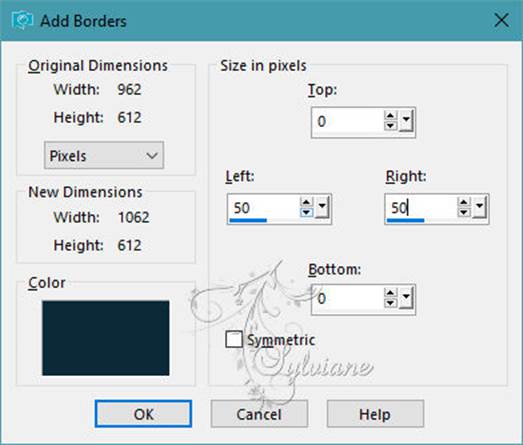
Selections - Invert
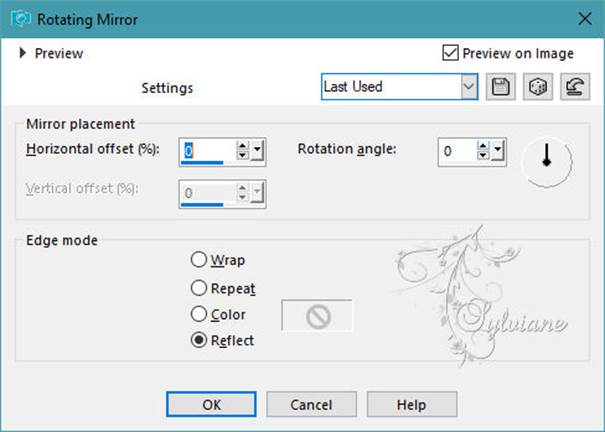
Effects – plugin - VM Toolbox - Zoom Blur
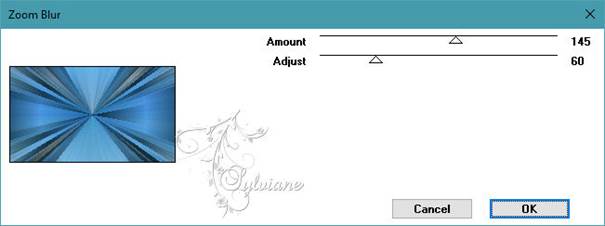
Reflection effect==>Rotating mirror==>configured as follows:
==================================================
10.
Selections – Promote selections to layer
Layers - New Raster Layer
Open DECO PERSO ETAPE 10 196 AVRIL 2023 SWEETY.png
Edit - Copy.
Edit - Paste into selection
Blend Mode: Luminance (lagacy)
Opacity: 35%
You can change the mode of this layer as well as its opacity -
Selection - Select None
Open DECO OMBRE PORTEE ETAPE 10 196 AVRIL 2023 SWEETYpspimage.png
Edit – Copy
Edit - Paste as new layer
DO NOT MOVE IT IS IN ITS PLACE
Blend Mode: Luminance (lagacy)
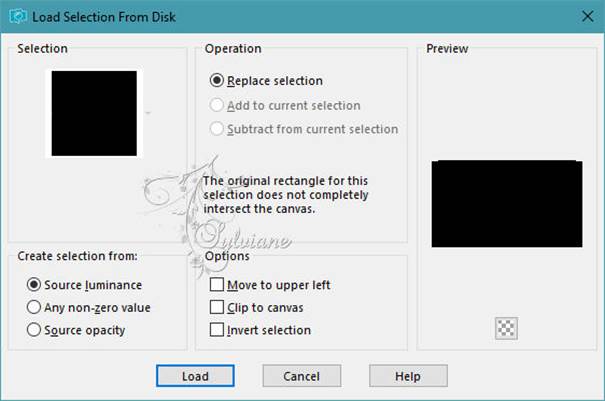
Selections - Load / Save - Load selection from disk - SELECTION 3 196 .PspSelection
Layers - New Raster Layer
Fill with the same color as your other borders:
Selection - Select None
==================================================
11.
Edit – copy special- copy merged
Paste as new image and leave on hold
On our work in short
Image - Add Borders – symmetric - 2px - light color (ARP or AVP) -
Selection - Select All
Image - Add Borders – symmetric – 30px-color dark border (AVP or ARP)
Selections - Invert
Selections – Promote selections to layer
Selection - Select None
Open DECO PERSO PSP ET PNG POUR CADRE FINAL ETAPE 11
Edit – Copy
Edit - Paste as new layer
Mode of the layer of choice or color changer with light or reverse color depending on your border:
==================================================
12.
Layers - New Raster Layer
Selection - Select All
activate the image from point 11
Selection - Select None
Effects - geometric effects – perspective vertical step 8
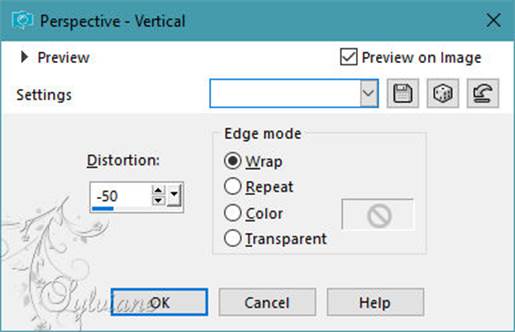
Selector tool enabled (K on the keyboard)... Arrange as on my capture:
(NOTE: To see what I was doing I closed my eyes to this layer)
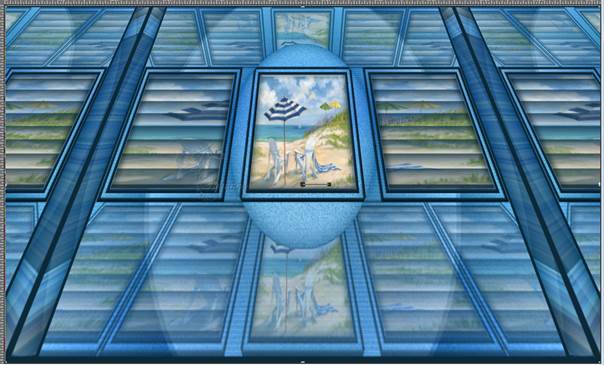
Disable the selector tool (M on the keyboard).
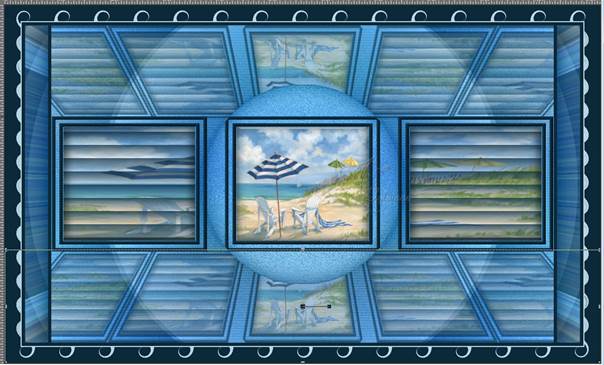
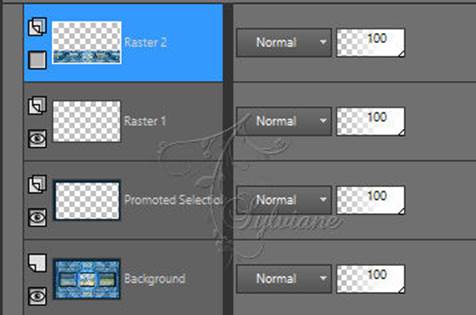
Don't forget to re-open the eyes of this layer...
Magic Wand Tool ==>tolerance 0 / Progressiveness 100
Click in the empty part of the layer.
Delete or delete 15 times
Selection - Select None
------------------------------------------------
13.
For my 1st version:
Open AVRIL 2023 LUDMILLA 2 24 04 23 SWEETY.png
Edit – Copy
Edit - Paste as new layer
Resized to 110%
put it like this in the example
Open AVRIL 2023 CHAISE LONGUE 24 04 23 SWEETY.png
Edit – Copy
Edit - Paste as new layer
Image - Mirror – mirror Horizontal
put it like this in the example
Open FEVRIER 2022 MOUETTES 2 22 02 22 SWEETY pspimage.png
Edit – Copy
Edit - Paste as new layer
Resized to 50%
put it like this in the example
Opacity to 75%
Open FEVRIER 2022 MOUETTE 1 22 02 22 SWEETY pspimage.png
Edit – Copy
Edit - Paste as new layer
Resized to 30%
Image - Mirror – mirror Horizontal
put it like this in the example
Drop shadow on each element of your choice
=============================================================
14.
Image - Add Borders – symmetric - 2px - color : AVP
Image - Add Borders – symmetric - 5px - color : ARP
Image - Add Borders – symmetric - 2px - color : AVP
Affix your signature and mine if you wish
Layer – merge – merge all (flatten)
Resize to 950 pixels
Save as JPEG
Back
Copyright Translation 2023 by SvC-Design